It's Terminal
Bootstrapping With Starship, Just, Direnv, and UV
In spite of the ominous title, there's a lot packed in this post. For a while, I've wanted to be more comfortable with the terminal, as well as reduce the friction between ideas and the time it takes to set up a Python project. So I decided to tackle it with a few different tools.
Overview
Quite a while ago, I wrote about how hard it can be to get started with Python. Part of that post was talking about some basics, like getting comfortable with an IDE, installing Python, and using virtual environments.
This post is a bit of an extension of that.
In addition to using a few new-to-me tools, there have been changes in the Python packaging ecosystem which warrants a revisit.
Recently, Trey Hunner wrote about switching to a set of tools that I had been curious to try out.
After reading through his post, I thought I was in for a world of hurt as I barely understood anything at all.
But, I decided to go for it anyway because I'm a glutton for punishment.
Goals
Keep in mind, I'm a Windows user and already have WSL installed. I also use Windows Terminal, but most, if not everything in this post, is applicable in other terminals/shells as well.
My goals here were a bit lofty. Here they are in no particular order.
- Try my hand at using
uvto bootstrap my Python projects - Use
direnvto automate.venvcreation and activation - Create reusable
justcommands to ease this process - Use different
gitcredentials based on which directory I'm in - Stop using PowerShell altogether and commit to WSL
- Learn about these so-called dotfiles
- Why not pretty up my Terminal while I'm at it using
starship?
Woah. That's actually a lot of stuff. If you use Windows and already have WSL (Ubuntu) and Windows Terminal, you should be able to follow along. Even if you don't, most of this should work if you have a bash shell (and can be easily adapted for other shells, such as zsh).
How It Started
I had, in the past, used Oh My Posh to make my terminal look a little prettier. When I first did it, I kind of cobbled my way through it and applied it to PowerShell and was fairly happy with the results.
But if I had to do it again, I'd likely have to start from scratch. 🤔
I was using PowerShell for certain projects in GitHub, and WSL (Ubuntu) for other projects in GitLab. Switching back and forth was kind of a pain, so I wanted to consolidate my usage in one place.
I've also used just as a command runner in the past, but it felt like I could use it more effectively.
And even though I've been very comfortable using the vanilla Python commands for virtual environment creation and activation, I wanted to remove that small hurdle.
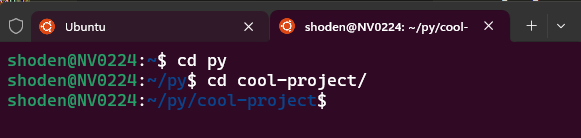
For reference, this is what my WSL shell looked like before I got started:
So let's see how I went about accomplishing my goals (FYI, the order of steps below does not follow the list above).
To the Stars 🚀
My first step was to get Starship on my system. The installation instructions are straightforward. You can install it using curl.
curl -sS https://starship.rs/install.sh | sh
But in order to start using Starship, you have to tell your shell to initiate it every time you start a new shell.
But how is this accomplished?
Enter dotfiles.
The best way I can describe them is to refer to them as configuration files (though they can be much more than that as well).
For example, if you use a bash shell, there should be a file located in your home directory called ~/.bashrc.
You can view this file by navigating to your home directory (cd ~) and checking all contents (ls -a), or in one command (ls -a ~/).
I use VSCode as my code editor (and IDE), so I can open that file directly with this command: code ~/.bashrc.
If you open the file in your preferred text editor, you can now add this line at the bottom to ensure that Starship starts up each time you open a new terminal window.
# ...other bash stuff

eval "$(starship init bash)"
More Pretty
The out-of-the-box experience for Starship is already pretty great. However, you can configure it to fine-tune your experience.
To do this, you will need to add a—you guessed it—a dotfile.
The default location for this file is in a ~/.config directory (again, in your home directory), with a file inside called starship.toml.
You can then decide what info is displayed and even control what your prompt looks like. For example, here is my entry for what a "python" directory should look like:
[python]
format = 'via [${symbol}(${version} )(\($virtualenv\) )]($style)'
symbol = "🐍 "
style = "bold #f3e10b"
(Actually, I ended up changing the symbol from a 🐍 to a Python logo with Nerd Fonts.)
You can see my full configuration file on GitHub.
My prompt ended up looking like this:

Note that the prompt is very basic when in the ~/py directory, but provides a lot more information when I've gone into the ~/py/cool-project directory.
Starship is checking for some conditions (such as the existence of Python-specific files) to be met before changing the appearance of your prompt.
You can ignore the direnv stuff for now.
Or Can You?
Never mind, we'll get into direnv next.
What does it do?
It loads and unloads environment variables depending on your current directory.
Now, due to the curse of knowledge, I may be taking for granted that you already know what environment variables are and how they are used in your shell.
It's too big a subject to get into right now, but for the context of this blog post, I'll say that it facilitates two of my goals.
One, it will allow me to switch git credentials based on which directory I am in.
Secondly, it will take care of my Python virtual environments (activating them when I switch into a project with an existing virtual environment, and deactivating when I navigate away).
To install it, I also used a curl command:
curl -sfL https://direnv.net/install.sh | bash
Next, to use it, you also have to include it in you ~/.bashrc file (or its equivalent).
# ...other bash stuff

eval "$(starship init bash)"
eval "$(direnv hook bash)"
This now allows you to use special .envrc files at the root of any directory, and any environment variables set will be available within that directory or while in subdirectories, and as such be loaded into your shell session (until you navigate outside of that directory or subdirectories).
So what can I do with this?
Git Over Here
My next goal was to be able to use different git configurations depending on which directory I'm in.
Let's say I have personal GitHub projects that will all reside within my ~/py directory. However, lets say I have an organizational email registered for other projects, and they all reside in ~/org.
First, I create a .gitconfig file in each of these directories.
# ~/py/.gitconfig
[user]
    name = Mario Munoz
    email = pythonbynight@gmail.com
# ~/org/.gitconfig
[user]
    name = Mario Munoz
    email = organizer@example.com
Then, in each of those directories, I also create .envrc files. They will be responsible for injecting these variables to the shell for any respective subdirectories.
# ~/py/.envrc
export GIT_CONFIG_GLOBAL=$(pwd)/.gitconfig
# ~/org/.envrc
export GIT_CONFIG_GLOBAL=$(pwd)/.gitconfig
Every time you create or change a .envrc file, you need to make sure to allow direnv to execute. This is only done once (that is, until you modify the file again).
So after creating the .envrc file in each respective directory, run the following command:
direnv allow
And that's it!
Now you can switch between personal and organizational projects without having to change your git configuration each time!
Credit: Much of this was lifted from this blog post over at The Mythical Engineer.
Uuumm... Uv?
If you're not too plugged in to the chatter of Python tooling, you may not be as aware as to how exciting Astral's uv is for the Python ecosystem.
Even with reservations about this specific tool, it already has strong support among the community. (See this video by Hynek Schlawack).
For my sake, I want to be able to create a new Python project using the uv init command.
But first, how do I even get uv?
Traditionally, most Python tools require Python itself to be installed in your system. You can install uv in the same way, either with pip install, or pipx install if you already have pipx in your system.
However, uv also comes with its own standalone installer. And if you've been following along, this command should be familiar:
curl -LsSf https://astral.sh/uv/install.sh | sh
By default, this installs to ~/.cargo/bin, though you can change that if you prefer. The installer also updates your shell profiles to make sure you can use the uv command (it adds the uv binary to your PATH).
I believe what that means is that it will add a new line to your /.bashrc file.
# ... other bash stuff

eval "$(starship init bash)"
eval "$(/home/shoden/.local/bin/direnv hook bash)"
. "$HOME/.cargo/env"
I wont get into great detail as to the benefits of uv, as there are other articles already doing a good job at that. (uv sync is amazing.)
One of the great things about uv is that you no longer have to download a version of Python before using it in a virtual environment. You can still do that, of course, but uv greatly reduces the barrier to entry here.
This means that now, I can automate the creation of python projects, along with the .venv directory for my virtual environments, and together with direnv, be ready to start working on my project pretty much instantaneously.
Virtual Insanity
So I stayed up late (as one does) trying to get a nice workflow between just, direnv, and uv to take my Python side-project-game to the next level.
First, going back to direnv, I learned that I could customize how it functions by creating a function that looks for specific conditions.
Luckily, there is a community wiki that pretty much spells it out for you!
First, we need to create a file in ~/.config/direnv/direnvrc that does a couple of things. First, it checks if there is an existing .venv file in the current directory, and if not, it runs uv venv, which is the command to create a virtual environment with uv. Lastly, it activates the existing or newly created .venv environment.
It then exports the necessary environment variables that are active only when you're within that current directory (or subdirectories).
However, when is this function called?
Good question.
When you create a new directory, you'll want to create a .envrc file, and the contents of the file should simply have layout uv, which calls the function we created in direnvrc.
But does that mean that I have to manually create a .envrc file every time I start an new project AND have to remember to run direnv allow as well?
Thanks for asking!
Just One More Night...
This is where just comes in.
I've decided to create a justfile at the root of the directory with all my personal Python projects. (~/py/justfile)
Now, with this command runner, I can create a recipe that will do a couple of things. For example, running a command kicks of a series of events.
First, it creates a new directory with a project-name.
Then, it checks to see if uv is installed. If not, it installs uv using python -m pip install uv. Next, it uses uv to create a new project using uv init.
After that, it navigates to the new project directory and creates a .envrc file and adds the line layout uv to it. It also runs the command direnv allow.
And lastly, it customizes the .gitignore file (uv init creates a generic .gitignore file, but I like mine to have more parameters).
I won't get into the details of how
justworks, but the just manual pages are pretty great. There are many ways to installjustinto your system. I usedsudo apt install just, but use your package manager of choice. Not much more you need to do after that.
With just, direnv, and uv, I have an extremely robust way of getting started with a Python project, and it is so fast! By the time I am done running the command just new-app cool-project, I can change directory into that project and the .venv is built and activated!
Additionally, uv init has a --lib flag which changes the structure of your project into a library, and I can control that with my justfile!
Take a look at my recipes in GitHub.
Mission Complete
In the end, I was able to accomplish my goals and learned a lot along the way.
I wrote it all down in this blog so I don't forget, and so that maybe it can help you too!
I now know what all the hubbub is about with using uv as a package manager and I expect it will ease the onboarding for newer Python developers.
I was able to learn how to use direnv to help me manage multiple .gitconfig files, and have migrated to using WSL exclusively (thanks PowerShell for all the memories).
Additionally, with the combination of just and these other tools, I am able to go from idea to actively working on a Python project in literally seconds.
Look at the prompts below.
First, I check to see what recipes are available by typing just in my command line. Then, I create a new project by typing just new-app cool-project. Immediately after, I change directory into this new project and I have all the new project files, including an activated .venv environment, a pyproject.toml file, a customized .gitignore, and so on!

As referenced above, most of my configurations are now up on GitHub.
Hopefully this inspires you to bootstrap your own coding environment to remove friction between those awesome ideas and your first line of code.